How to Choose the Right Motorcycle Fairing Kit: A Complete Buyer's Guide
Upgrading or replacing your motorcycle's fairings is one of the most impactful changes you can make to your bike both visually and functionally. Whether you're repairing crash damage, refreshing an old paint job, or building a custom race-inspired look, choosing the right fairing kit takes more than picking a color you like. This guide walks you through everything you need to know before you buy.
What Are Motorcycle Fairings?
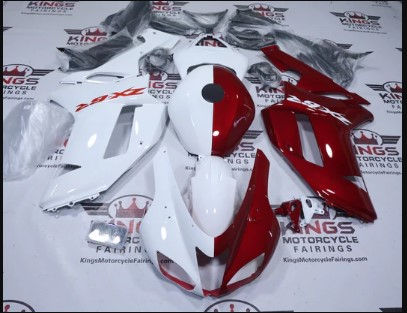
Fairings are the molded body panels that cover a sportbike's frame, engine, and internal components. Beyond looks, they serve real functional purposes: reducing aerodynamic drag, protecting the rider from wind and road debris, shielding internal parts from heat and weather, and giving the bike its aggressive, streamlined profile.
Step 1: Confirm Your Exact Model and Year
This is the single most important step and the one most commonly overlooked. Fairing kits are molded to match the exact body dimensions of a specific bike model and year range. A kit built for a 2015-2016 model won't necessarily fit a 2017 version of the same bike, even if they look similar. Always double-check your bike's model year against the kit's listed compatibility before ordering.
Step 2: Decide Between Full Kits and Individual Pieces
Most retailers offer two options:
Full fairing kits - includes everything needed to fully re-panel your bike, ensuring consistent paint color and line matching across every piece.
Individual pieces - useful if you've only damaged a nose fairing, side panel, or tail section and want to match your existing paint rather than replace the whole set.
If you're going for a completely new look, a full kit is almost always the better choice, since matching paint on an individual piece to older panels can be tricky.
Step 3: Know What Should Be Included
A complete fairing kit should typically include:
Front nose fairing
Left and right side fairing panels
Lower belly pan
Tail section
Front and rear tire fenders
Fairing panel inserts
Heat shielding near the engine and exhaust
Many retailers also include a free clear windscreen with the option to upgrade to tinted or colored versions, plus optional add-ons like a matching seat cowl or a bolt kit for installation hardware.
Step 4: Evaluate Material and Molding Quality
Not all aftermarket fairings are built the same. Look for:
ABS injection molding - holds shape and paint better than cheaper thermoformed plastics
Pre-drilled bolt holes - indicates the kit was molded specifically to OEM dimensions, saving you from cutting or force-fitting panels
Multi-step paint process - a proper paint job includes prepping, priming, multiple color coats, decal placement, and several layers of clear coat for durability and shine
Step 5: Choose Your Finish and Style
Fairing kits come in a wide range of finishes beyond solid colors:
Gloss - high-shine, classic look
Matte - smooth, modern, non-reflective
Metallic - reflective flakes that sparkle in sunlight
Pearl - shimmering, color-shifting tones
Chameleon - dramatic color shifts depending on viewing angle
Carbon fiber-style - a woven-look cosmetic finish (note: this is typically a printed or molded look, not structural carbon)
Many riders also opt for race-replica liveries or fully custom designs submitted directly to the manufacturer.
Step 6: Read Reviews Carefully
Testimonials can be a helpful trust signal, but be cautious of generic reviews that appear across many unrelated product listings these are often reused site-wide rather than specific to your exact bike and colorway. Where possible, look for reviews or photos from riders with your specific model.
Step 7: Installation Tips
Once your kit arrives:
Remove and replace one panel at a time to avoid mixing up hardware
Use a matched bolt kit if offered, to prevent stripped threads
Double-check heat shield placement near the exhaust before finishing the tail section
Final Thoughts
A quality fairing kit can transform your bike's appearance and performance for a fraction of the cost of OEM replacement parts. The key is doing your homework upfront: confirm your exact model and year, understand what's included, check the material and paint quality, and don't be afraid to ask about custom options. Get these details right, and your new fairings will look and fit like they were built for your bike from day one.


Comments